The weather may be dreary but your look doesn’t have to be!
Kevin Murphyhimself is featured in a step-by-step video tutorial on how to achieve the first style in his Classic Looks:Glamour! With the help of the Kevin.Murphy Young. Again. Wash & Rinse, Body.Builder, Smoothing.Brush and Shimmer.Shine products, you can achieve this gorgeous look right from your own home.
Lining your eyes
can dramatically change the look of your eyes.
It creates different illusions in the most complimenting way. Today I will show you which way is the best
way to line your eyes and which product works best.
Types of Liners ( most liners offers water resistant and non-water
resistant formula)
Pencil Liners – Control level is easy
·
Lots of colour selection
·
Easy to apply , can be applied for both bottom and top,
·
Less tools to use, just the pencil alone
·
Creates a soft look, smudgy look and define look
Liquid Liner ( comes in the felt tip and
precise point liner ) – Control Level is
medium
·
Comes in various colour but mostly the common brown, black,
·
Known for more dramatic clean line ( great for the cat / winged look )
·
Can be lined in many ways like a marker/pen
·
Is not buildable and does not create a smudge sultry effect
·
Most people love the look but find the application difficult
Cake Liner ( looks like a hard eye shadow ) – Control Level is
medium - hard
·
Comes in mostly black and brown
·
Creates very similar line as to a liquid liner
·
Requires a brush and a mixer to make this work, eye sealer or water mixed
with the cake liner
Cream / Gel Liners – control level is Medium
to hard
·
Comes in various colours
·
Has approx.10 seconds time of playtime before it sets in and gets hard
·
Creates a very define and dramatic look.
Comes in a jar which allows air to come in and dry the product up which means the product life is shorter than most liners.
You can watch my makeup tutorial as I explain how to Apply Eyeliners
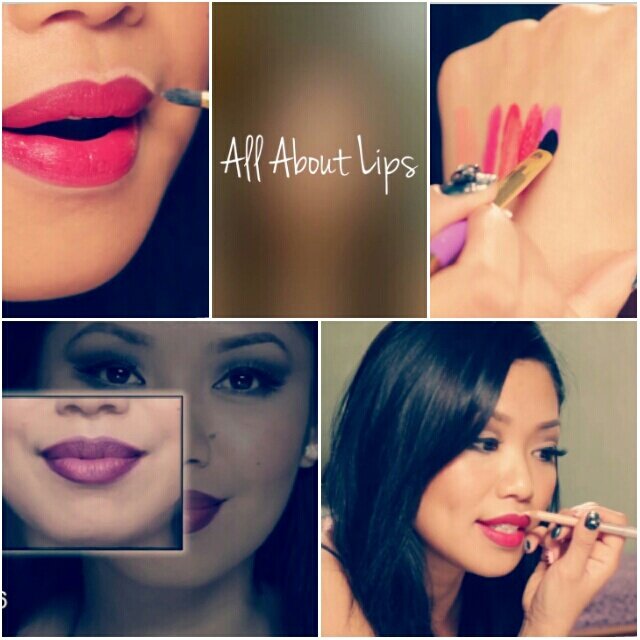
Lips are an essential part of your face. They are noticeable when you are doing absolutely anything with your mouth. Therefore, it is extremely important to make sure your lip products are applied correctly. Naturally, you also want to make sure which products will help you achieve the look you are going for. With so many out there including gloss, lipstick, balms, scrubs, etc... it's hard to pick out the right ones & master how they are used. I am here to save the day. Pucker Up Ladies ~ Time to look lipstick ready!
Lipgloss
provides mostly shine and very moisturizing.
Lipsticks ( different finishes matte, sating,
gloss, lustre etc. )
can finish sheer ( gloss finish) to opaque ( matte finish)
main ingredients is waxes and oils
can come in a tube lipstick, lip crayon, lip pot etc
has the widest range of colors of all the lip products
Liquid Lipsticks ( mixture
of both gloss and lipstick in one)
very long wearing
highly pigmented
finishes in shine or matte
comes in a convienience of a tube and brush for easy application
Has a great selection of color
Lip stains ( lip colour that leaves a
stain)
Lip stains are meant to enhance natural tones
very long wearing
most are water-based / gel-based but some very long wearing Lip Stains may contain alcohol which is very drying for the lips
small range of color
Liquid Color( mixture of both gloss and lipstick in one)
very long wearing
highly pigmented
finishes in shine or matte
comes in a convienience of a squeeze tube
you can create your own color with combining other colors
Has a great selection of color
Lip Liner - comes in both non waterproof and waterproof
Products used in the Video Tutorial: • Make Up Forever " N41 Watermelon" • NARS "Funny Face" • YSL Glossy Stain " 11 Rouge Gouache" • NYX Lip Cream " Pure Red" • OCC Lip Tar " Hoochie" • Lise Watier " Portfolio" • Maybelline Fit Me " 220 " • Make Up For Ever "47 Burgundy" • NYX Lip Cream " Pure Red" • Cargo " The Reverse Lip Liner"
Winter challenges
our skin more than any other season. The biggest problem is that our skin will
tend to be more dry in our hands, body and especially the face. I’m going
to show you how to give your skin some extra attention that it deserves, even if you don't your dry skin will be a constant reminder!
The
indoor heat along with the cold outdoor temperature makes your skin drier,
no matter what your skin type is.
Learning
proper products and techniques to ensure that you give your face the
proper attention to avoid or at least minimize the problem.
Cleansers to suggest if you have
Dry
skin:Use
a facial serum or oil under a thicker-formula moisturizer.
Oily Skin:Use an oil-free serum and oil-free moisturizer.
Combination skin:Use oil-free products on the T‑zone and a thicker moisturizer
on the cheeks, which get drier in the wintertime. (including almond, jojoba, or
avocado oil) that don’t clog the pores.
If you have dry skin, you
must avoid water as much as you can; take short showers, and wash your face
with cleansing milk. Everyone should drink more water (or hot green tea) in
the wintertime. Many times dry skin gets
flakes on the eyelids and cheeks and around the lip area. The best way to get
rid of them is to exfoliate the skin right after showering, when the skin is
still soft. Always remember to apply moisturizer! This incudes your face and body.
* Tip* You can use the same method on superdry lips:
exfoliate your lips and the skin around them with an exfoliating cream or lip
scrub (many cosmetic manufacturers make lip spa products with scrubs and
various kind of balms and sealing creams).
Use a humidifier to add
moisture to your indoor space if you have to use drying central heating. Put
one in your bedroom, and you will notice the difference in your skin in the
morning, especially when using face serum and night cream. Your skin will be
softer and moister.
Face / Base
Slightly richer
foundations are better because there is more to cover on your skin in the winter (uneven areas on the nose, cheeks, and eyelids).
· You must use
SPF/UVA/UVB protection all year round. The sun that reflects from the snow is
as strong as the sun that reflects from water. So choose a day cream with at
least SPF 15, or a foundation with SPF.
· Powder is needed
all over the face for oily skin. Those with combination and dry skin should use
powder on the T‑area only to set the base. If your skin is dry and flaky, don’t
use any base product, just a face oil and your protecting SPF 15 face cream Colour Choice
Apply warmer pastel tones, if youhave fair skin its better to go a little bit deeper, for example, if you like baby pink lips and you have fair skin, go for a deeper pink lip.Fair skin and pastel colours will make you look wash out.Pastel colours look better on medium to tan skin
Eyes
· Cream eyeshadows are good for the winter season
Depending where
you live, but if you’re in climates that snow and rain a lot during the winter
time, use water-proof/water resistant eye liners and mascara to avoid any
makeup disasters. If you wear regular mascara, going in and out of different
temperatures will make your mascara run.
· Waterproof cream
liners are great because its more moisturizing and will stay in place.
· Trick : use your waterproof
mascara as a liner if you can't find your liner
Cheeks / Blush
· Blush is a key item to the
winter makeup look. It really gives some color to your skin and wakes up your
whole face.
· I like using creams or makeup stains because
it gives my skin colour but it’s also moisturizing, The color of your blush is
completely your own choice, again, if you have a cool-tone look, use pink. Warm
tone, it can be peach, warm sand, or terracotta. The only colour I would leave
out are bronzes ( orangy ). They really don’t look great in winter unless its
for shading/contour.
· Lips
· Cracked lips are the number
one problem in winter. If your lips are superdry, skip lipsticks with matte
finishes or lip stains, which can be very drying for the lips. Even before lip
application, always remember to moisturize your lips with lip balm.
· Make sure the balm has SPF and UVA/UVB
protection.
· Exfoliate your lips
regularly throughout the cold months. That way you will get rid of the dry
flakes on the surface of your lips. You can use your face exfoliator and gently
in a circular motion remove and dead skin on your lips.
·
Ever feel like your face is being bullied by the harsh winter air? I do! Learn my makeup tips for the winter time that will keep your skin healthy and vibrant while you sport the perfect look for the cold weather. Check out my Make Up Tutorial
To use these makeup tips you will need:
• Face Cream: Neo Strata Face Cream Plus • Foundation: Make Up Forever Face and Body #34 • Foundation Brush: Lise Watier • Concealer: Nip and Fab Eye Fix Brightening Concealer • Eyebrow Powder: Anastasia Brow Duo Brunette • Primer: Benefit Stay Don't Stray • Eyeshadow: Smashbox Shades of Fame Gold • Eyeshadow: Smashbox Shades of Fame Bronze • Liner: Maybelline Colossal Black Waterproof • Blush: Lisa Watier Sauvignon • Pressed Power: MAC Select Sheer NC 25 • Powder Brush: MAC #150 • Lip Balm: Khiels Lip Balm • Lip Shine: Annabelle Breathe
Jessica Chastain looked stunning at the Oscars rocking the vintage Hollywood look! Glowy skin, strong red lips, and beautiful finger waves for her hair made her look like a goddess on the red carpet. There was definitely nothing zero or dark about her ;) Here is my take on how to get this look.
To get Jessica Chastain's look you will need Products Used in the Video:
• Yves Rocher Radiant Glow Foundation (Mac Strobe Cream ) • Make Up Forever Foundation • Lise Watier Foundation Brush • Maybelline Dream Lumi Touche in Buff Chamois • MAC Select Sheer Lose Powder in NC15 • Large Powder Brush from Dali • Deca Dark Brown Eyebrow Pencil • Lise Watier Sunrise Peach - Coming In March • NYX Liquid Liner - Black • Loreal Volumious Carbon Black • Loreal Blush - Front Page Peach • MAC Cherry Lip Liner • Erins Faces in Micro Red
"Everyone wants to know, are they real? False Lashes that is! One of the most dramatic changes in a makeup application that will make your eyes pop! Although people are scared to wear them because they may look fake but most importantly, “how the heck do you even apply them!” It’s one of my best kept secrets, and maybe will be yours. "
Your eyes are often the first thing people notice so it's important to dress them up fabulously. If you weren't blessed with huge lashes, like me, there's a perfect solution: false eyelashes. I teach you how to properly pick, cut, glue and apply these beautiful fringes so you can accent those gorgeous eyes! Time to start batting away ;)
Products Used in the Video: • Abella #46 • Ardelle #110 • Ardelle # 117 • Furtastic Mink Lashes • Small brow scissor • NYX Liquid Liner " Black " • Shiseido Eye Lash Curler • Ardelle Lash Grip "clear" • Revlon Lash Adhesive For a written tutorial go to: http://www.marlaydrive.com/how-to-app... LIKE the video and tell me how your false lashes worked out!
Here is a Make Up Tutorial called Pretty in Pink inspired by Valentines Day! This pretty in pink valentines day look is flirty and fun. It’s perfect whether you are having a candlelight dinner with that someone special OR you are celebrating with your besties. This look is also perfect for the office giving you a natural cute glow. (WARNING: Sporting this look may result in anonymous love letters, roses and/or proposals.) .
To do this Valentines Day look you will need:
• Anastasia Brow Wiz - " Brunette"
• Lise Watier - " Portfolio Wheel "
• Concealer Brush - "Private Label"
• NYX - " Eye Primer "
• Lorac - "Sweet Temptation "
• NARS - "Large Dome Brush"
• NARS - "Small Dome Brush"
• OCC Loose Pigment - "Flicker "
• Shiseido - Eyelash Curler
• NYX - " Black Liquid Liner "
• Lime Crime - " Lunar Sea "
• False Lashes
• Revlon - Lash Glue
• L'Oreal Volumious Mascara - " Carbon Black"
• Make Up For Ever - " Pink #26"
• Stila - " #24 Double-Sided Powder Brush "
• MAC - " Mangenta Lip Liner "
• Lancome - "L'ABSOLU CRÈME DE MAT - Magie Pourpre L/E "
I posted a few pictures of this look on my Instagramand recieved many requested to do a tutorial on it. Its a semi-dramatic look for some but for me this is probably a look I' take photos with or a night out.
Products Used: ( click on it to see full picture) I have also added links to the products or similar products
Dressing up for St. Patrick's Day can be fun but what about dressing up your face instead? All you need is green eyeshadow paired with my smokey eye technique and you will look Patrick ready. This look guarantees you will have all the luck on your side with your beautiful green eyes that pop!
To do this Green Smokey Eye you will need: • NYX - Eye Shadow Base • Make Up For Ever -- Eye Shadow -- Lagoon Green #168 • Eye Shadow Brush • Eye Angel Brush • Make Up For Ever -- Eyeshadow -- Apple Green #91 • Crease Blending Brush • Bare Minerals -- Pure Radiance • Small Crease Brush • Lise Watier -- Green Liner - Vert • Furtastic Lashes • Mascara Lancome -- Hypnose • Lise Watier -- Prebiotic Micellar Water • Deca Brow Pencil -- Dark Brown • Stila Illuminating Foundation • Lise Watier -- Color Wheel Portfolio • Make Up For Ever -- Sculpting Kit • Powder Brush • Lise Watier -- Pink Power • Blush Brush • OCC Lip Tar -- Trick
I had this picture on Instagram and recieved a lot of request for a tutorial. Unfortunately I did not take
photos Step By Step so hopefully I can write it for you. I listed the 'colour type' and linked it to the one I used in the above photo. You can always use this picture for inspiration and create your own. My rule for most nail looks is that if I want to alternate nail colours I tend to stick to 4 colours so it doesn't look too busy.
***Please note***After the Polish and 2 top coats, I applied the jewels.
Index : Base Coat from Sally Hansen , 2 Coats of Coral ( Chna Glaze Flip FLop Fantasy ) on half of the nail diagonally as shown in the above picture, I used a black and white striping nail polish and created diagonal lines. I topped it off with black matte small round crystals for effect.
Middle : Base Coat from Sally Hansen , 2 Coats of Dark Teal ( Mary Kay - Tempting Teal ), and on the bottom center near the cuticle I applied a pink tear drop crystal
Ring : Base Coat from Sally Hansen , 2 Coats of Coral ( Chna Glaze Flip FLop Fantasy ) , Using the white striping nail polish I striped 4 lines horizontally to create some contrast to the nail . Then I used the Black Striping pen to create a lace looking design and attached the Black Bow just below the center of the nails
Time to let down your hair and embrace the blossoming flowers. Spring is around the corner so it's time to brighten up our look with soft, beautiful makeup to match the sunny weather.
To do this spring makeup you will need:
• NYX Eye Shadow Base
• Make Up For Ever Technicolor Pallete
• Lise Watier Eye Shadow "Sunrise Peach"
• Gorgeous Eyeliner Pen
• Mary Kay Gel Liner " Tempting Teal "
• False Lashes - Red Cherry #46
• Lise Watier Mascara "Dramatique"
• Lise Watier Blush " Pink Power"
• Annabelle Lip Gloss " Breathe"
LIKE the video and tell me how your Spring Look turned out!
It’s true what they
say,” Brows frame the face” it’s the starting point of the face! Women make 3
common mistakes over plucking, wrong shape and wrong colour! Today, I’m going
to show you how to create that perfect brow that work best for you.
Most
people do not realize it, but the human eye constantly seeks out balance. Having properly shaped eyebrows add this
balance to the face. A fuller, symmetrical brow will instantly lift the face
and add a more youthful appearance to your entire aesthetic.
Methods of Grooming – wax, threading, tweezers
Tweezers
·
Invest in a good
tweezers, expensive tweezers aren’t necessarily better tweezers.
·Good tweezers are important for precisely shaping
your brows. If the quality of your tweezers is poor, or they are misaligned,
they will not be able to pull the hair at the root. Your brows will grow in
more quickly and will look far less polished. This is also an issue with
"pain-free" tweezers. These instruments actually sheer the hair,
instead of plucking it. While it may hurt a little less in the moment, your
brows grow in thicker and faster than with a pair of premium, calibrated
tweezers with a slanted tip.
TIPS FOR TWEEZING PAIN FREE
·Before
you begin the tweezing process it is recommended to wrap an ice cube into a
paper towel and slightly rub your eyebrows with it. This will gradually numb
the critical area, making the tweezing easier and more painless.
·You
can use this trick also after you finished, it will perfectly reduce the
redness and the possible inflammation.
·Alcohol
can also have a soothing effect. Apply it to the eyebrows right before and
while the tweezing lasts. If you feel that the tweezing is still painful, you
might try to do it gradually.
·Pluck
one hair at a time, don't rush, give yourself a few second to sooth. Then
quickly wipe the brows again with the alcohol.
·OR
tweeze after taking a bath. The steam will efficiently dilate the pores,
which eases the plucking process. If the hair will come out more quickly and
without any extra effort, the tweezing will seem less painful
How to find your
shape
.
Determine
your eye set ( close, far, normal etc ) Eye set is recognized by measuring your eye from the
inner to outer corner. If your measurement is 7 cm and the distance
between your two eyes is also the same, this means you have normal set
eyes. If it is more, then you have wide set eyes and if it is less you it
is close set eyes. Or use the 3rd eye in the middle
SpacingRecognizing your eye set will help as a starting
point for the best fit eyebrow shape. If you have close set eyes, shaping
will require more space between your eyebrows. The brows should begin a
little past the inner eye to give the illusion of a normal eye set. If you
have wide set eyes, then you should not over pluck in between your brows,
less space will better suit your face.
Shaping The eyebrow arch starts from your pupil and gradually
goes up and then down towards the end. The arch shape depends on your bone
structure.
There
are many different shapes of eyebrows
·Rounded shaped
eyebrows soften features.
·Soft angle eyebrows,
the most preferred shape, is arched and feminine.
·Angled eyebrows have
a high arch and work well to mask droopy eyelids. It gives you a more youthful
look.
·Straight eyebrows
work best for those with a longer face shape face. Straight eyebrows make their
face appear shorter and oval.
Finding your Colour and
the Right Product for you.
There are kits nowadays, brunettes,
blondes, auburn etc. which comes with everything which is great! Avoid black, if anything, dark brown should
be the darkest shade. Try matching it closest to your hair. With blondes, I like to pick an ashy light
brown with a hint of green, taupe. It looks more natural than going with a
light brown
Brow
Gel
·
Looks
like a mascara, but has a tint of colour and different finish
·
Applies
like a mascara but on the brow hairs, positions the hairs so it doesn’t move
·
Great
for women with full eyebrows that don’t need to fill in their brows with
colour more so to tame them
·
On
the go access, takes seconds to apply.
Pencil/Gel
·
Creates
a more dramatic look and shaper looking eye brow, comes in water proof which is
great comes in limited colour but the basics
·
Convenient,
comes in a pencil so its just “ drawing”
Powder
·
Creates
a softer looking brow
·
More
natural looking
·
There
are brow kits that comes in blondes,brunettes, etc, but can easily be replaced
or colour matched best with just regular eye shadow
·
Needs
to be applied with an angle brush for precision
Application
Once you understand what shape best
suits your face, you can use the following tip to complete your new shape like
a pro.